Guide
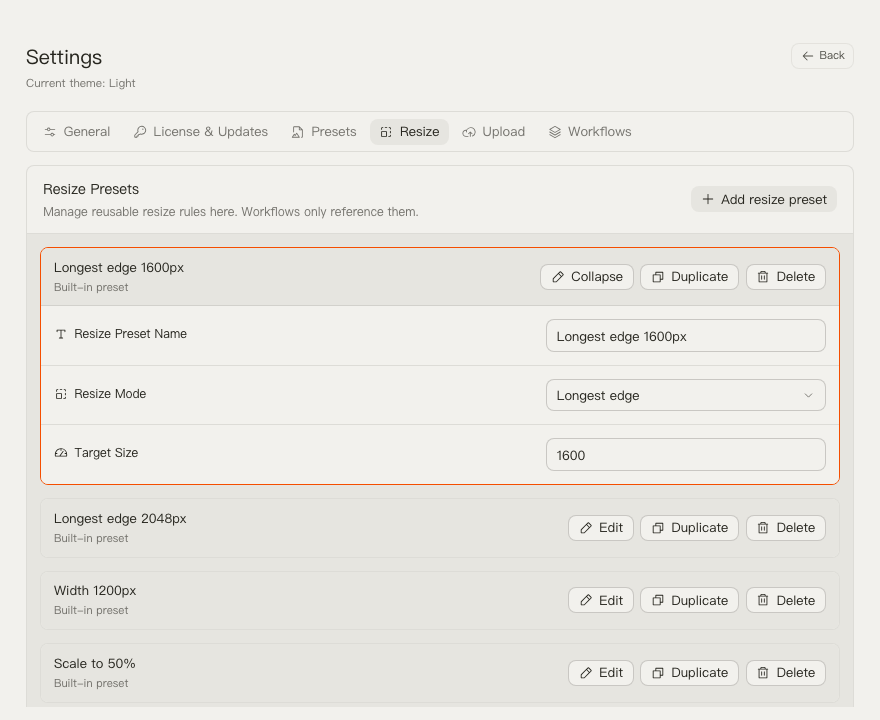
Resize Presets
Resize presets define dimension changes that run before compression. They are optional in workflows and reusable across many workflows.
Edit a Resize Preset
Use this path when a workflow should change image dimensions before compression.
- Open Settings.
- Select Resize Presets.
- Click Edit on an existing resize preset, or click Add resize preset.
- Change the preset name if needed.
- Choose the resize mode.
- Enter the value for that mode.
- Return to Settings -> Workflows if a workflow should use this preset.
Resize Modes
- Longest edge: keep aspect ratio and limit the longest side.
- Width: set a target width and preserve aspect ratio.
- Height: set a target height and preserve aspect ratio.
- Scale: resize by percentage, such as 50%.
TinyOwl currently resizes images in this workflow step. It does not provide freeform crop framing here.
Use a Resize Preset in a Workflow
Editing a resize preset does not automatically add resize to a workflow. Compression output format and compression level still come from a separate Compression Preset.
- Open Settings -> Workflows.
- Expand the workflow with Edit.
- Click Add resize step if the workflow does not have one.
- Select the Resize step.
- Choose the resize preset.
- Click Use now if this workflow should be active in the main window.
Resize always runs before compression. If you remove the resize step, the workflow keeps original dimensions.
Built-In Resize Presets
TinyOwl includes these starting points:
- Longest edge 1600px
- Longest edge 2048px
- Width 1200px
- Scale to 50%
Notes
- Use resize presets for repeated dimension targets.
- Keep names task-oriented, such as “Blog width 1200”.
- Use compression presets for output format and compression level; use resize presets only for dimensions.