Guide
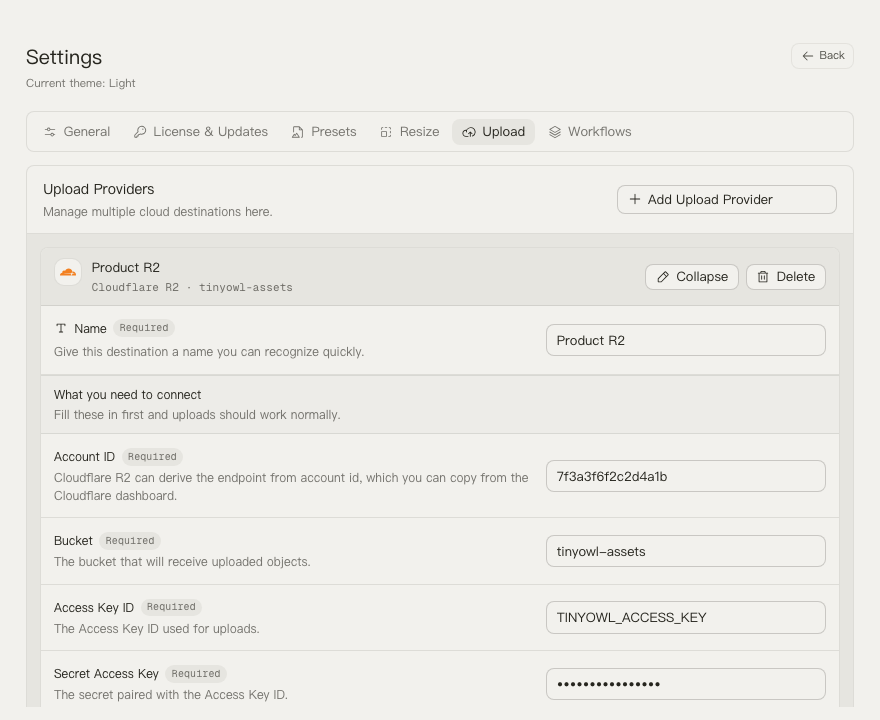
Upload Providers
Upload providers store the destination and credentials used by workflow upload steps. Create and test a provider before adding it to a workflow.
Add an Upload Provider
- Open Settings.
- Select Upload Providers.
- Click Add Upload Provider.
- Choose a provider preset: Cloudflare R2, AWS S3, Alibaba OSS, Tencent COS, MinIO, or S3-Compatible.
- Fill in the required fields.
- Click Test connection.
- After the test succeeds, open Settings -> Workflows and add an upload step to the workflow that should use this provider.
TinyOwl Fields
TinyOwl uses these fields for uploads:
- Bucket: the destination bucket name.
- Access Key ID and Secret Access Key: credentials used for S3-compatible upload requests.
- Account ID: used by Cloudflare R2 when endpoint is not entered manually.
- Region: the storage region. R2 defaults to
auto. - Endpoint: required for generic S3-compatible providers. For R2, TinyOwl can build
https://<ACCOUNT_ID>.r2.cloudflarestorage.comfrom the Account ID. - Public Base URL: optional. If set, TinyOwl can show copyable public URLs after upload.
- Path Prefix: optional provider-level prefix added before the workflow path template.
- Force Path Style: used by S3-compatible storage that requires path-style requests. TinyOwl forces this on for R2 and off for AWS S3.
Object keys are built like this:
provider path prefix / workflow path template / upload filenameThe workflow path template supports {yyyy}, {mm}, and {dd}.
Cloudflare R2
In TinyOwl:
- Choose Cloudflare R2.
- Enter the R2 bucket name.
- Enter your Cloudflare account ID, or manually enter the R2 S3 endpoint.
- Create an R2 API token and copy its Access Key ID and Secret Access Key.
- Keep region as
auto. - Test the connection.
Cloudflare documents that R2 S3 credentials are created from the R2 dashboard API token flow, and that the S3 endpoint format is https://<ACCOUNT_ID>.r2.cloudflarestorage.com. See Cloudflare R2 authentication.
AWS S3
In TinyOwl:
- Choose AWS S3.
- Enter the S3 bucket name.
- Enter the bucket region, such as
us-east-1orus-west-2. - Create or use an IAM access key with permission to write to the bucket.
- Enter the Access Key ID and Secret Access Key.
- Leave endpoint empty for normal AWS S3.
- Test the connection.
AWS describes access keys as an access key ID plus a secret access key, and S3 buckets are created in a specific AWS Region. See AWS IAM access keys and Amazon S3 buckets.
Alibaba OSS
In TinyOwl:
- Choose Alibaba OSS.
- Enter the OSS bucket name.
- Enter the region ID, such as
cn-hangzhou. - Enter the public endpoint for that region, such as
https://oss-cn-hangzhou.aliyuncs.com. - Enter an Alibaba Cloud AccessKey ID and AccessKey Secret with write permission.
- Test the connection.
Alibaba Cloud lists OSS region IDs and public endpoints in its OSS regions and endpoints documentation.
Tencent COS
In TinyOwl:
- Choose Tencent COS.
- Enter the COS bucket name including APPID, for example
examplebucket-1250000000. - Enter the region abbreviation, such as
ap-shanghai. - Enter the endpoint, such as
https://cos.ap-shanghai.myqcloud.com. - Enter SecretId as Access Key ID and SecretKey as Secret Access Key.
- Test the connection.
Tencent Cloud documents COS bucket naming as <BucketName-APPID> and region endpoints such as <BucketName-APPID>.cos.ap-guangzhou.myqcloud.com. See COS bucket overview and COS regions and endpoints.
MinIO and Other S3-Compatible Storage
In TinyOwl:
- Choose MinIO or S3-Compatible.
- Enter the bucket name.
- Enter the endpoint, for example
http://127.0.0.1:9000for a local MinIO server. - Enter the access key and secret key for that server.
- Keep Force Path Style enabled unless your provider requires virtual-hosted style.
- Test the connection.
For MinIO, use the access keys and endpoint from your MinIO deployment or console. MinIO documents access key management in its identity and access management documentation.
Add Upload to a Workflow
After creating a provider:
- Open Settings -> Workflows.
- Expand the workflow.
- Click Add upload step.
- Select the provider.
- Choose the upload filename strategy.
- Set the upload path template, for example
{yyyy}/{mm}/{dd}. - Click Use now if this workflow should run from the main window.
For the full workflow editor flow, see Workflows.